Step-by-Step Guide to Apply for Solar Subsidy Online in India 2026
Applying for solar subsidy in India has become fully digital in 2026, with the National Portal for Rooftop Solar streamlining the entire process from registration to subsidy disbursement. Homeowners can now complete their applications online and track approvals in real time.
What Is the National Portal for Rooftop Solar?
Launched by the Ministry of New and Renewable Energy (MNRE), the National Portal for Rooftop Solar is the official platform for residential consumers to apply for the PM Surya Ghar: Muft Bijli Yojana subsidy, select empanelled vendors, and monitor their installation and subsidy status. The portal consolidates consumer registration, DISCOM approvals, vendor coordination, and direct benefit transfer (DBT) into one unified system.
Documents You Need Before Starting
Before you begin your online application, keep digital copies of your latest electricity bill in your name, Aadhaar card or government-issued ID proof, property or roof ownership documents, bank passbook or cancelled cheque, and a recent passport-size photograph. Having these ready ensures a smooth, uninterrupted application process.
Step 1: Visit the Official Portal and Register
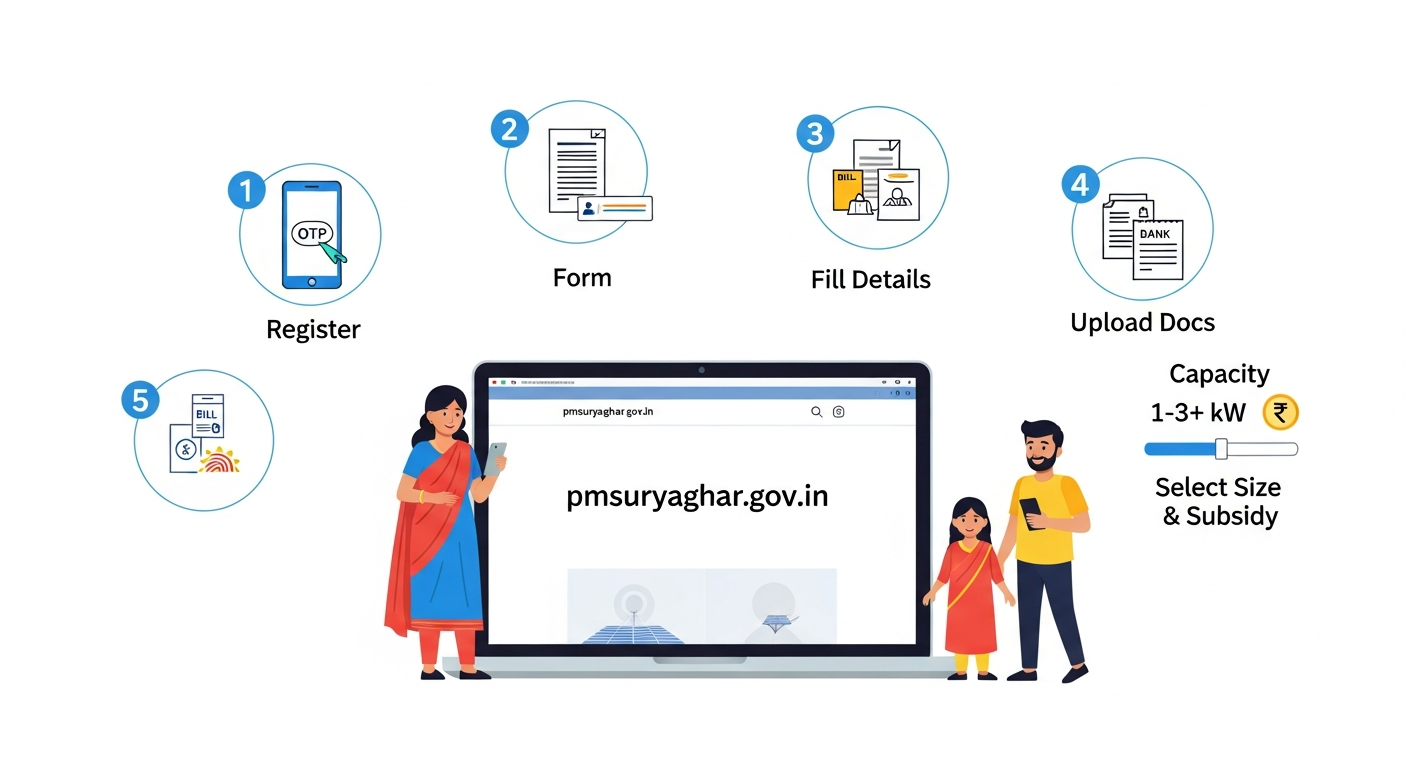
Go to pmsuryaghar.gov.in and click "Apply Now" under the consumer section. Enter your mobile number, verify it with an OTP, and create your account by providing your name, email address, state, district, PIN code, and DISCOM details. Save your details to complete the initial registration.
Step 2: Fill the Online Application Form
After registration, log in using the "Consumer Login" option and click "Apply for Solar Rooftop." Select your state, district, DISCOM, and enter your electricity consumer number from your bill. The portal will auto-fetch some details and prompt you to upload your electricity bill, Aadhaar, property proof, bank details, and photograph. Choose your desired system capacity (1 kW, 2 kW, 3 kW, or higher), and the portal will automatically display the subsidy amount you are eligible to receive.
Step 3: Select an Empanelled Vendor
Once your application is submitted, your local DISCOM will review it and provide feasibility approval within approximately seven days. After receiving feasibility clearance, you can choose an MNRE-approved or state-empanelled solar vendor from the portal's vendor list to conduct a site survey, design your system, and proceed with installation.
Step 4: Installation, Inspection, and Subsidy Claim
Your selected vendor installs the solar system using certified panels and inverters that meet BIS and safety standards. After installation, the DISCOM schedules a final inspection and issues a commissioning certificate confirming that your system is operational and connected via net metering. Upload the commissioning certificate, installation photos, invoices, net meter proof, and bank details on the portal, and the central subsidy is transferred directly to your Aadhaar-linked bank account within 30–60 days via Direct Benefit Transfer.
Track Your Application Status
The portal allows you to monitor every stage—application submission, feasibility approval, vendor selection, installation, inspection, and subsidy disbursement—in real time, ensuring transparency and accountability throughout the process.
FAQs
Q1. What is the official website to apply for solar subsidy in India?
Visit pmsuryaghar.gov.in, the National Portal for Rooftop Solar launched by MNRE, to apply for residential solar subsidies online.
Q2. How long does the online solar subsidy application take?
The entire process from registration to subsidy disbursement typically takes a few weeks to 30–60 days, depending on DISCOM approvals and installation completion.
Q3. Can I fill the application myself or do I need a vendor?
You can register and fill the initial application yourself; vendor selection happens after DISCOM feasibility approval for installation and technical support.
Q4. What documents are mandatory for the online solar subsidy application?
You need your electricity bill, Aadhaar or ID proof, property ownership proof, bank details, and a passport-size photograph.
Q5. How will I receive my solar subsidy after installation?
The subsidy is transferred directly to your Aadhaar-linked bank account via Direct Benefit Transfer after final DISCOM inspection and commissioning approval.

